
Explore the Lens & Mirror Ray Diagram
Drag the object and the focal point and watch the principal rays form the image. Free, no signup, runs in your browser.
- Free to use
- No signup
- Nothing to install
- Runs in your browser
Illustration. Open the tool for the real thing.
See it in action
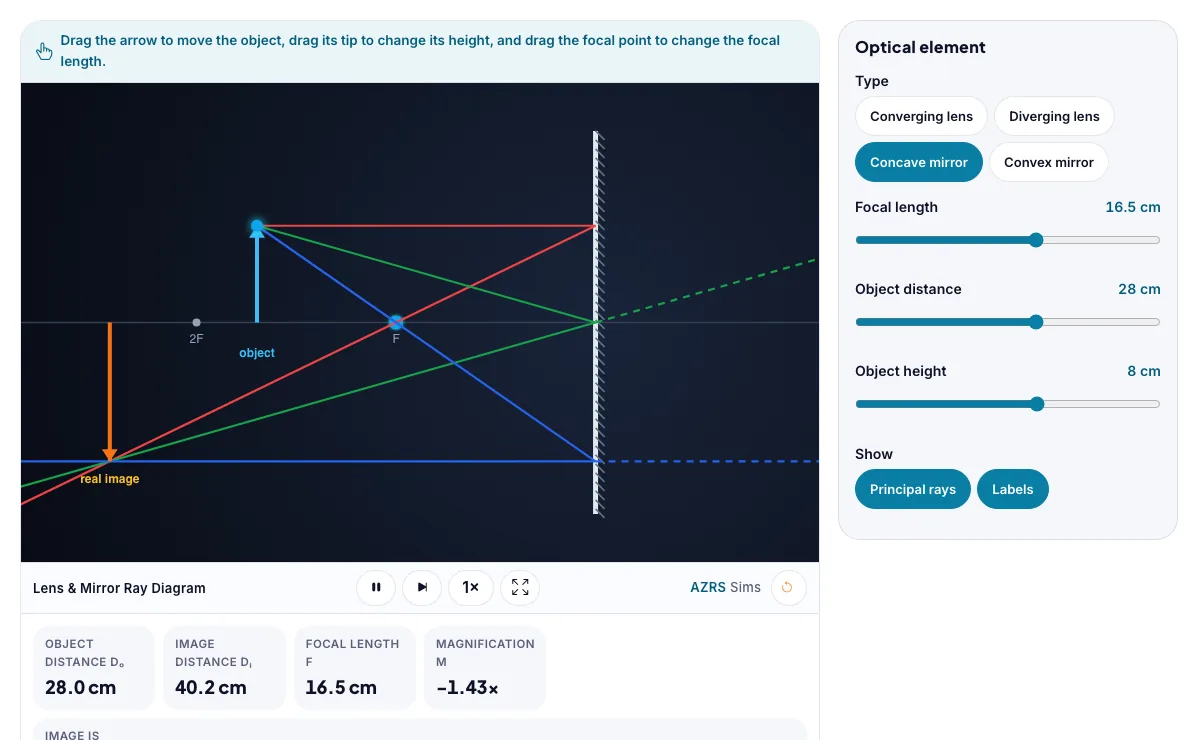
The Lens & Mirror Ray Diagram with sample data entered and the result showing.
What is the Lens & Mirror Ray Diagram?
Drag the object and the focal point and watch the principal rays form the image. It runs in your browser, so a change to a setting or a drag on an object shows up at once.
Cameras, telescopes, microscopes, glasses and car mirrors all rely on lenses and mirrors forming images.
3 steps to your result
Open the tool and follow along. Nothing to install.
What you get
Thin lens equation: 1/f = 1/do + 1/di.
Magnification m = −di / do. A negative m means the image is inverted.
An object inside the focal length of a converging lens gives a virtual, upright, enlarged image.
Drag the object from far away to inside the focal length and watch the image flip.
Switch between a converging lens, diverging lens and mirrors.
Find the object position that gives an image the same size as the object.
Used for
Pick one to see how it fits.
Physics learners
Physics students in middle school, high school and first-year university, teachers who want a quick demonstration for the projector, and anyone revising for exams.
Try it freeTeachers
For teachers: project the Lens & Mirror Ray Diagram on the board, let students predict the result, then run it together and test this: Switch between a converging lens, diverging lens and mirrors. For students: change one thing at a time and write down what changes.
Try it freeHow it compares
A plain look at this tool next to the usual alternative.
| This simulation | Textbook diagram | |
|---|---|---|
| Interactive | Drag, tap and change settings | Fixed picture |
| Install | Nothing to install | Not needed |
| Cost | Free to use | Depends on the book |
Questions people ask
What is the difference between a real and a virtual image?
A real image is formed where light rays actually meet and can be shown on a screen. A virtual image is where rays only appear to come from, so it cannot be projected.
Where do the principal rays go?
One ray runs parallel to the axis and then passes through the focus. One passes through the centre undeflected. One passes through the near focus and comes out parallel.
Is the Lens & Mirror Ray Diagram free to use?
Yes. The Lens & Mirror Ray Diagram is free, needs no signup or download and runs in your web browser. It is part of the Physics group of AZRS simulations.
Does the Lens & Mirror Ray Diagram work on a phone or tablet?
Yes. The Lens & Mirror Ray Diagram takes touch input as well as mouse input, so you can use its 3 adjustable settings with a finger. A larger screen makes the controls and graphs easier to read.
How do I use the Lens & Mirror Ray Diagram?
1. In the Lens & Mirror Ray Diagram, use the controls to change Focal length, Object distance, Object height. The simulation reacts instantly. 2. In the Lens & Mirror Ray Diagram, pick an option such as Converging lens, Diverging lens, Concave mirror, Convex mirror to switch modes or load an example. 3. Start with this experiment: Drag the object from far away to inside the focal length and watch the image flip. Drag any glowing handle, object or slider with your mouse or finger and the Lens & Mirror Ray Diagram responds in real time. 4. Change one setting at a time and watch which readout moves, then compare it with this idea: Thin lens equation: 1/f = 1/do + 1/di.
More free tools
Related to the Lens & Mirror Ray Diagram.
Try the Lens & Mirror Ray Diagram now
Drag the object and the focal point and watch the principal rays form the image. Free to use.
Try it free