Onshape Export Format Helper — Which Format for What?
Pick the right Onshape export format and settings for printing, laser, CAM, AR, sharing · free, no signup
See Onshape Export Format Helper — Which Format for What? in action
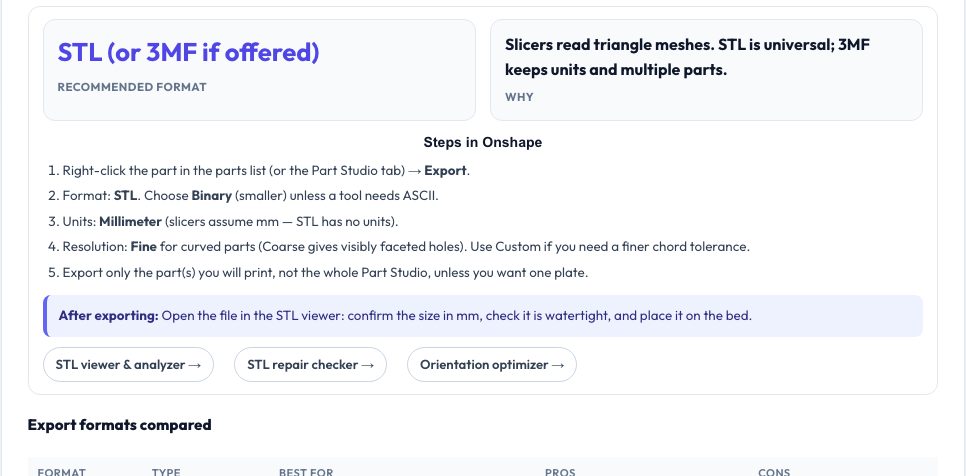
Onshape Export Format Helper
Onshape can export to many formats and the best one depends on where the file is going. Pick your goal and this helper recommends the format, the dialog settings that matter (for STL: binary, millimetres, resolution), where to find the export command, what to check after exporting, and which of our free tools to use next — for example converting STEP to STL, checking an STL's watertightness, or turning a sketch DXF into an SVG for a laser cutter.
A comparison table explains the difference between the neutral solid formats (STEP, Parasolid, ACIS, IGES), the mesh formats (STL, OBJ, GLTF/GLB, 3MF where available) and the 2D formats (DXF, DWG, PDF) so you stop guessing. The guidance is written for students and makers using the free Onshape plan, and notes where menu names may differ slightly between Onshape releases.
Key features
Goal-based recommendations
3D printing, laser/CNC, CAM, rendering/AR, sharing CAD, drawings and FEA.
Settings that matter
STL format, units, resolution; DXF face/sketch export; assembly vs part exports.
Next-step links
Jumps to the converter, repair and viewer tools you will need.
Format comparison
Solid vs mesh vs 2D formats with pros, cons and typical uses.
How to use it
- Choose what you want to do with the file.
- Read the recommended format and settings.
- Follow the numbered steps in Onshape.
- Use the linked tool to check or convert the result.
Worked example
Example
Goal: 3D print. Recommendation: export the part as STL (binary, millimetres, Fine or custom resolution), then check it with the STL viewer for size and watertightness before slicing.
Who uses this tool
Onshape students
Know which format your instructor or slicer needs.
Makers
Get printable STLs without trial and error.
Laser/CNC hobbyists
Export faces as DXF at the right scale.
Tips for the best results
- STL has no units: always export in millimetres for slicers.
- Use STEP for sharing solids and STL/3MF only for printing.
- Export sketches or planar faces for 2D cutting — not the whole 3D part.
- After exporting, open the file in a viewer to confirm size and orientation.
Common mistakes to avoid
- Exporting STL at Coarse resolution and getting faceted holes.
- Sharing an STL when a collaborator needs editable geometry (use STEP/Parasolid).
- Exporting a drawing as an image instead of PDF/DXF.
Why use AZRS QuickFix?
It is 100% free, needs no signup and has no watermark or usage limits. The tool runs in your browser, so what you type stays on your device, and it works on phones, tablets and desktops. New tools are added every week — bookmark this page or browse the full QuickFix toolbox.
Frequently asked questions
Which format should I use for 3D printing?
STL is the universal choice; 3MF if your slicer and Onshape offer it. Use millimetres and Fine resolution.
STEP or Parasolid?
STEP is the neutral standard; Parasolid is more exact when the receiving CAD is Parasolid-based (SolidWorks, NX).
How do I get a DXF for laser cutting?
Export the sketch or planar face as DXF/DWG, then verify the scale with the DXF⇄SVG converter.
Where are the export options?
Right-click a Part Studio tab, a part or an assembly → Export; menu names can vary by release.