Lithophane Generator — Photo to 3D Printable STL
Turn a photo into a 3D-printable lithophane STL with backlit preview · free, no signup
See Lithophane Generator — Photo to 3D Printable STL in action
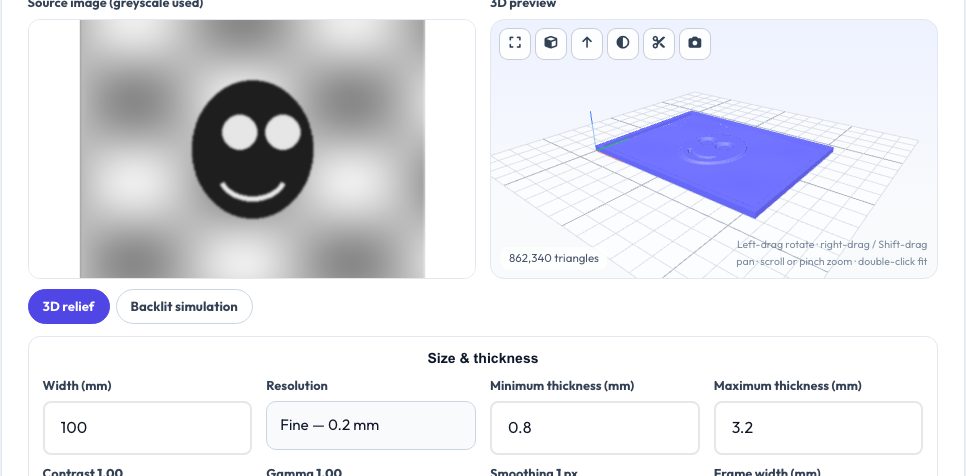
Free Lithophane Generator — Photo to STL
A lithophane is a thin relief that turns into a photograph when light shines through it: dark areas are thick and block light, bright areas are thin and let it pass. Drop in a photo and this generator converts brightness to thickness between the minimum and maximum you choose (for example 0.8 mm for white and 3.2 mm for black), builds a watertight solid with an optional frame, and shows both the 3D relief and a simulation of how it will look lit from behind.
Contrast, gamma and smoothing sliders let you fix washed-out photos before printing, and the resolution setting trades detail against file size (0.2 mm per pixel is a good default). The mirror option makes the picture read correctly from the flat side, which is how a lithophane is normally viewed. Download the STL and print it standing upright in white filament.
Key features
Photo to relief
Brightness mapped to thickness between your minimum and maximum.
Backlit simulation
See how the lithophane will look before printing.
Frame and mirror
Optional border and correct left/right orientation.
Private
Your photo is processed locally, never uploaded.
How to use it
- Drop in a photo (portraits with good contrast work best).
- Set the width, thickness range and resolution.
- Tune contrast, gamma and smoothing while watching the simulation.
- Download the STL and print it upright in white filament.
Worked example
Example
A 100 × 75 mm landscape photo at 0.2 mm resolution, 0.8–3.2 mm thickness and a 3 mm frame produces about 860k triangles with a 2.4 mm relief range (use 0.3 mm resolution for roughly 380k triangles).
Who uses this tool
Gift makers
Custom photo lamps and window hangings.
3D-printing hobbyists
Fast, private lithophane creation.
Teachers
Show how brightness maps to thickness.
Tips for the best results
- Use white or very light filament; thin layers (0.1–0.16 mm) and 100% infill.
- Print standing upright with the flat side toward the viewer.
- Increase contrast for dull photos; reduce smoothing for sharp portraits.
- Backlight with warm white LEDs — a dedicated lithophane lamp works best.
Common mistakes to avoid
- Printing it flat with supports — print it upright.
- Using coloured or translucent filament that muddies the image.
- Setting minimum thickness below about 0.6 mm and getting holes.
Why use AZRS QuickFix?
It is 100% free, needs no signup and has no watermark or usage limits. The tool runs in your browser, so what you type stays on your device, and it works on phones, tablets and desktops. New tools are added every week — bookmark this page or browse the full QuickFix toolbox.
Frequently asked questions
What thickness range should I use?
0.8 mm to 3.2 mm is a good starting range for white PLA; thinner minimum gives brighter whites.
Why mirror?
Viewed from the flat back the image appears flipped unless mirrored.
What resolution?
0.2 mm per pixel is detailed; 0.1 mm gives very large files.
Is my image uploaded?
No — processing is entirely in your browser.