Bearing, Magnet & Nut Pocket Size Calculator for 3D Printing
Pocket and hole sizes for bearings, magnets, nuts and screw heads by printer and fit, with a test coupon · free, no signup
Fit test coupon
See Bearing, Magnet & Nut Pocket Size Calculator for 3D Printing in action
Free Bearing, Magnet & Nut Pocket Size Calculator
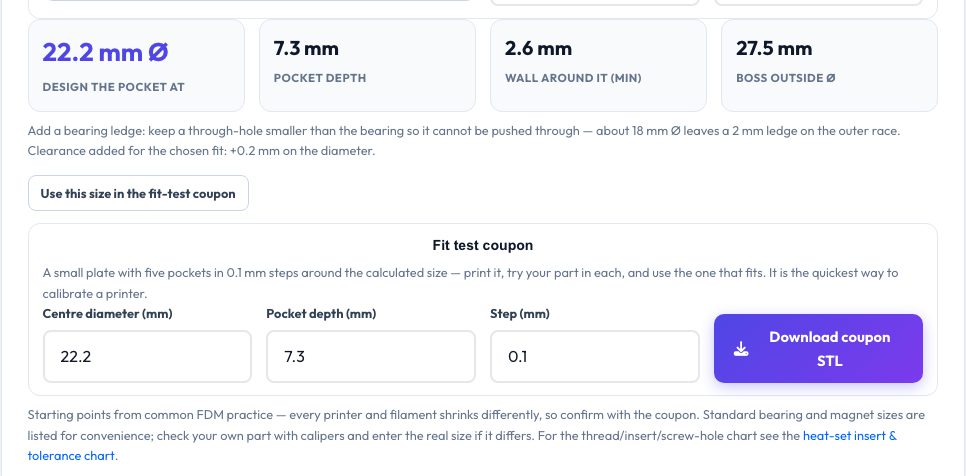
Designing a pocket for a 608 bearing, a 6 × 3 mm magnet or an M3 nut in a 3D-printed part always raises the same question: how big should the hole be? This calculator gives you the pocket diameter and depth for more than 30 common bearings (miniature, 6000/6200 series and LM-UU linear bearings), 22 round magnet sizes, and hex nut traps and screw-head counterbores for M2–M12, adjusted for your printing process (FDM, resin or SLS), the fit you want (press, snug, slip or loose), the hole direction and whether the pocket is covered.
It also shows the wall you need around the pocket, a bearing ledge so it cannot be pushed through, and notes for pausing the print to insert magnets. Because no calculator can know your printer, a button creates a fit-test coupon STL with five pockets in 0.1 mm steps around the calculated size — print it once, find the pocket that fits, and use that number from then on.
Key features
Bearings, magnets, nuts, screw heads
Over 60 standard sizes plus custom entry.
Process-aware
FDM, resin and SLS, vertical or horizontal holes, press to loose fits.
Fit-test coupon
Download a five-pocket STL stepped in 0.1 mm to calibrate your printer.
Practical notes
Ledges, cover layers, wall thickness and magnet polarity tips.
How to use it
- Pick the tab: bearings, magnets, or nuts and screw heads.
- Choose the part, process, fit and hole direction.
- Read the pocket size, depth and wall recommendations.
- Print the fit-test coupon to confirm for your printer.
Worked example
Example
A 608 bearing (22 × 7 mm) for an FDM snug fit gets a 22.20 mm pocket 7.3 mm deep with at least 2.6 mm of wall; a 6 × 3 mm magnet gets a 6.16 mm pocket 3.2 mm deep; an M3 nut gets a 5.66 mm across-flats hex pocket 2.7 mm deep.
Who uses this tool
Makers and designers
Skate wheels, spinners, robot joints and magnetic latches.
Robotics teams
Bearing seats and nut traps without trial and error.
Product designers
Embed magnets and hardware into printed parts.
Tips for the best results
- Print vertical holes whenever you can — they are rounder and more accurate.
- Press-fit bearings are best with a 0.1 mm interference test coupon.
- Add a 0.4–0.6 mm cover layer over magnets and pause the print to insert them.
- Check polarity before sealing a magnet in.
Common mistakes to avoid
- Using nominal size and finding the part will not fit.
- Forgetting a ledge and pushing the bearing out the back.
- Making walls too thin around strong magnets.
Why use AZRS QuickFix?
It is 100% free, needs no signup and has no watermark or usage limits. The tool runs in your browser, so what you type stays on your device, and it works on phones, tablets and desktops. New tools are added every week — bookmark this page or browse the full QuickFix toolbox.
Frequently asked questions
Are these values guaranteed?
No — they are common starting points; confirm with the coupon.
Why is horizontal larger?
Horizontal holes sag and print slightly undersized, so they need extra clearance.
Can I use my own sizes?
Yes, edit the diameter and thickness fields.
Is it private?
Yes, it all runs in your browser.